Fortress Occident Developer Blog

Comments

Picture math

Hi there! While the background renders are coming along, I’m taking a break from being a weather god to explain the Glorious MulTan Map (® ™ etc).

Everything in this post is black, white and red because it’s raining and I’m feeling particularly noir today. Cool

Baking the background for a pre-rendered game isn’t as straightforward as it used to be. For instance since we want to use real time lights we can’t just bake shadows into the background. Say if you illuminate an area in shadow with a flash light a render with baked in shadows will not have enough colour information to properly light up.

So. We have to split our background up into separate colour and shadow components. This is actually great because it will give us a chance to swap shadows based on the time of day. To do this we render our background map at three different times of day and with a very neutral overcast light. All together 4 versions.

Here’s our overcast render (neutral map) vs a moody morning map.

We render these into floating point EXR buffer files to keep as much information as possible for shadow map extraction. The following is how we extract the shadow component from our morning, noon and evening renders.

Stand back and hold onto your hats, we are going to do…

P i c t u r e   M a t h ! My Word!

Since our goal is an image of only shadow information we need to take one of our daylight renders and remove from it all information about geometry and texture (which in our case is the overcast neutrally lit render). We tried to do this step via subtraction to get an additive shadow map but the maths gave us an image with a whole lot of (mostly inverted) colour information in there as well. This is bad because we want to keep all colour information only in the neutral map since that’s where the final colour correction and brush strokes paintover pass happens.

Dividing the renders instead of subtracting gave us exactly what we wanted. A mostly colour-agnostic multiplicative shadow map. Beautiful.

Here’s the resulting map featuring the main problem in red:

All pixels in this image illustrated in garish red are values above 1. Pretty much every surface facing the sun is lit up into super high values because we’re dividing the daylight map by the darker (smaller) value of the neutral map. If we were to just clamp values at 1 we retain shadows but lose all information about anything that’s brighter than the neutral map. This would essentially work but look super bland. We can do better.

Here’s A/B between the clamped shadow map multiplied by our neutral map versus the original morning render. Should look similar but all the sunlight is grayed out by our clamp. Not nice at all.

This is how multiplicative maps work. They only make colours darker.

In order to not lose shading information in the range above 1, we would either need to use a floating point file format (no thanks, let’s stick to png), misuse the 8 bits of png channel as a floating point value or somehow squeeze it nonlinearly into the 0 to 1 range. Since the last two are virtually the same, let’s just avoid the brainhurt of bit juggling and go with the squeeze.

Looking at functions that could pack our (0 to possibly infinite) values into a 0 to 1 range, arctangent function looked like the most obvious choice. It starts out as a one to one (0 equals 0) accordance and loses resolution as values go up.

That’s exactly the kind of squeeze we need. Except for the poor little pi in there but that’s nothing a little math can’t get rid of.

More picture math!

Here’s the tangentified shadow map in its full grayed out glory.

Looks as flat and dull as the neutral color map but that’s because our mortal eyes can’t process infinity. Blink

The above is what is going to be used in engine. The game takes the map and does reverse math to unpack it to its full infinite range before multiplying back onto the neutral map.

Picture math galore!

Images in the above calculation are two blindingly uninteresting maps that, using a single function of trigonometry, combine to form our juicy clear morning sunshine.

To my surprise, from the tests I’ve run so far, the loss of arctan map resolution in the upper values has yet to manifest itself in any form. Highlights are fine, dark objects are fine, in light or shadow.

Oh look, it stopped raining! I can snap out of noir now.

We repeat the above process for all three times of day and get three separate shadow maps which we combine into the R, G and B channels of a single image file. Here’s what our shadow map looks like after being packed with morning, noon and evening shadows.

On the left is our old method which just took Cycles’ shadow pass (just plain binary soft shadow/light without bounces) and on the right the method described above. The former might look bright and clear but the new method carries much, much more subtle lighting information from render to engine.

I love picture math. Picture math makes pretty. Hand Shake Left Hand Shake Right

Comments

Peculiarities of Eastern European game development

Time for an update. Also, hi.  Gentleman

I am the programmer who is kept busy by the needs of the writers. I make the dialogues tick. If I had a card, it would say “Systems Designer”, but it is a made-up name. I’m a university-grown systems administrator/lecturer-turned-programmer (I still work in TUT). At some point I’m probably also show our rules system and then I get to talk about my background with D&D and larp.

Bootstrapping the Writers

I have been working on the project since August, but a lot of it has been what I’d call explorative programming: you hack on something, get something working and at the same time develop ideas of how they should work in reality.


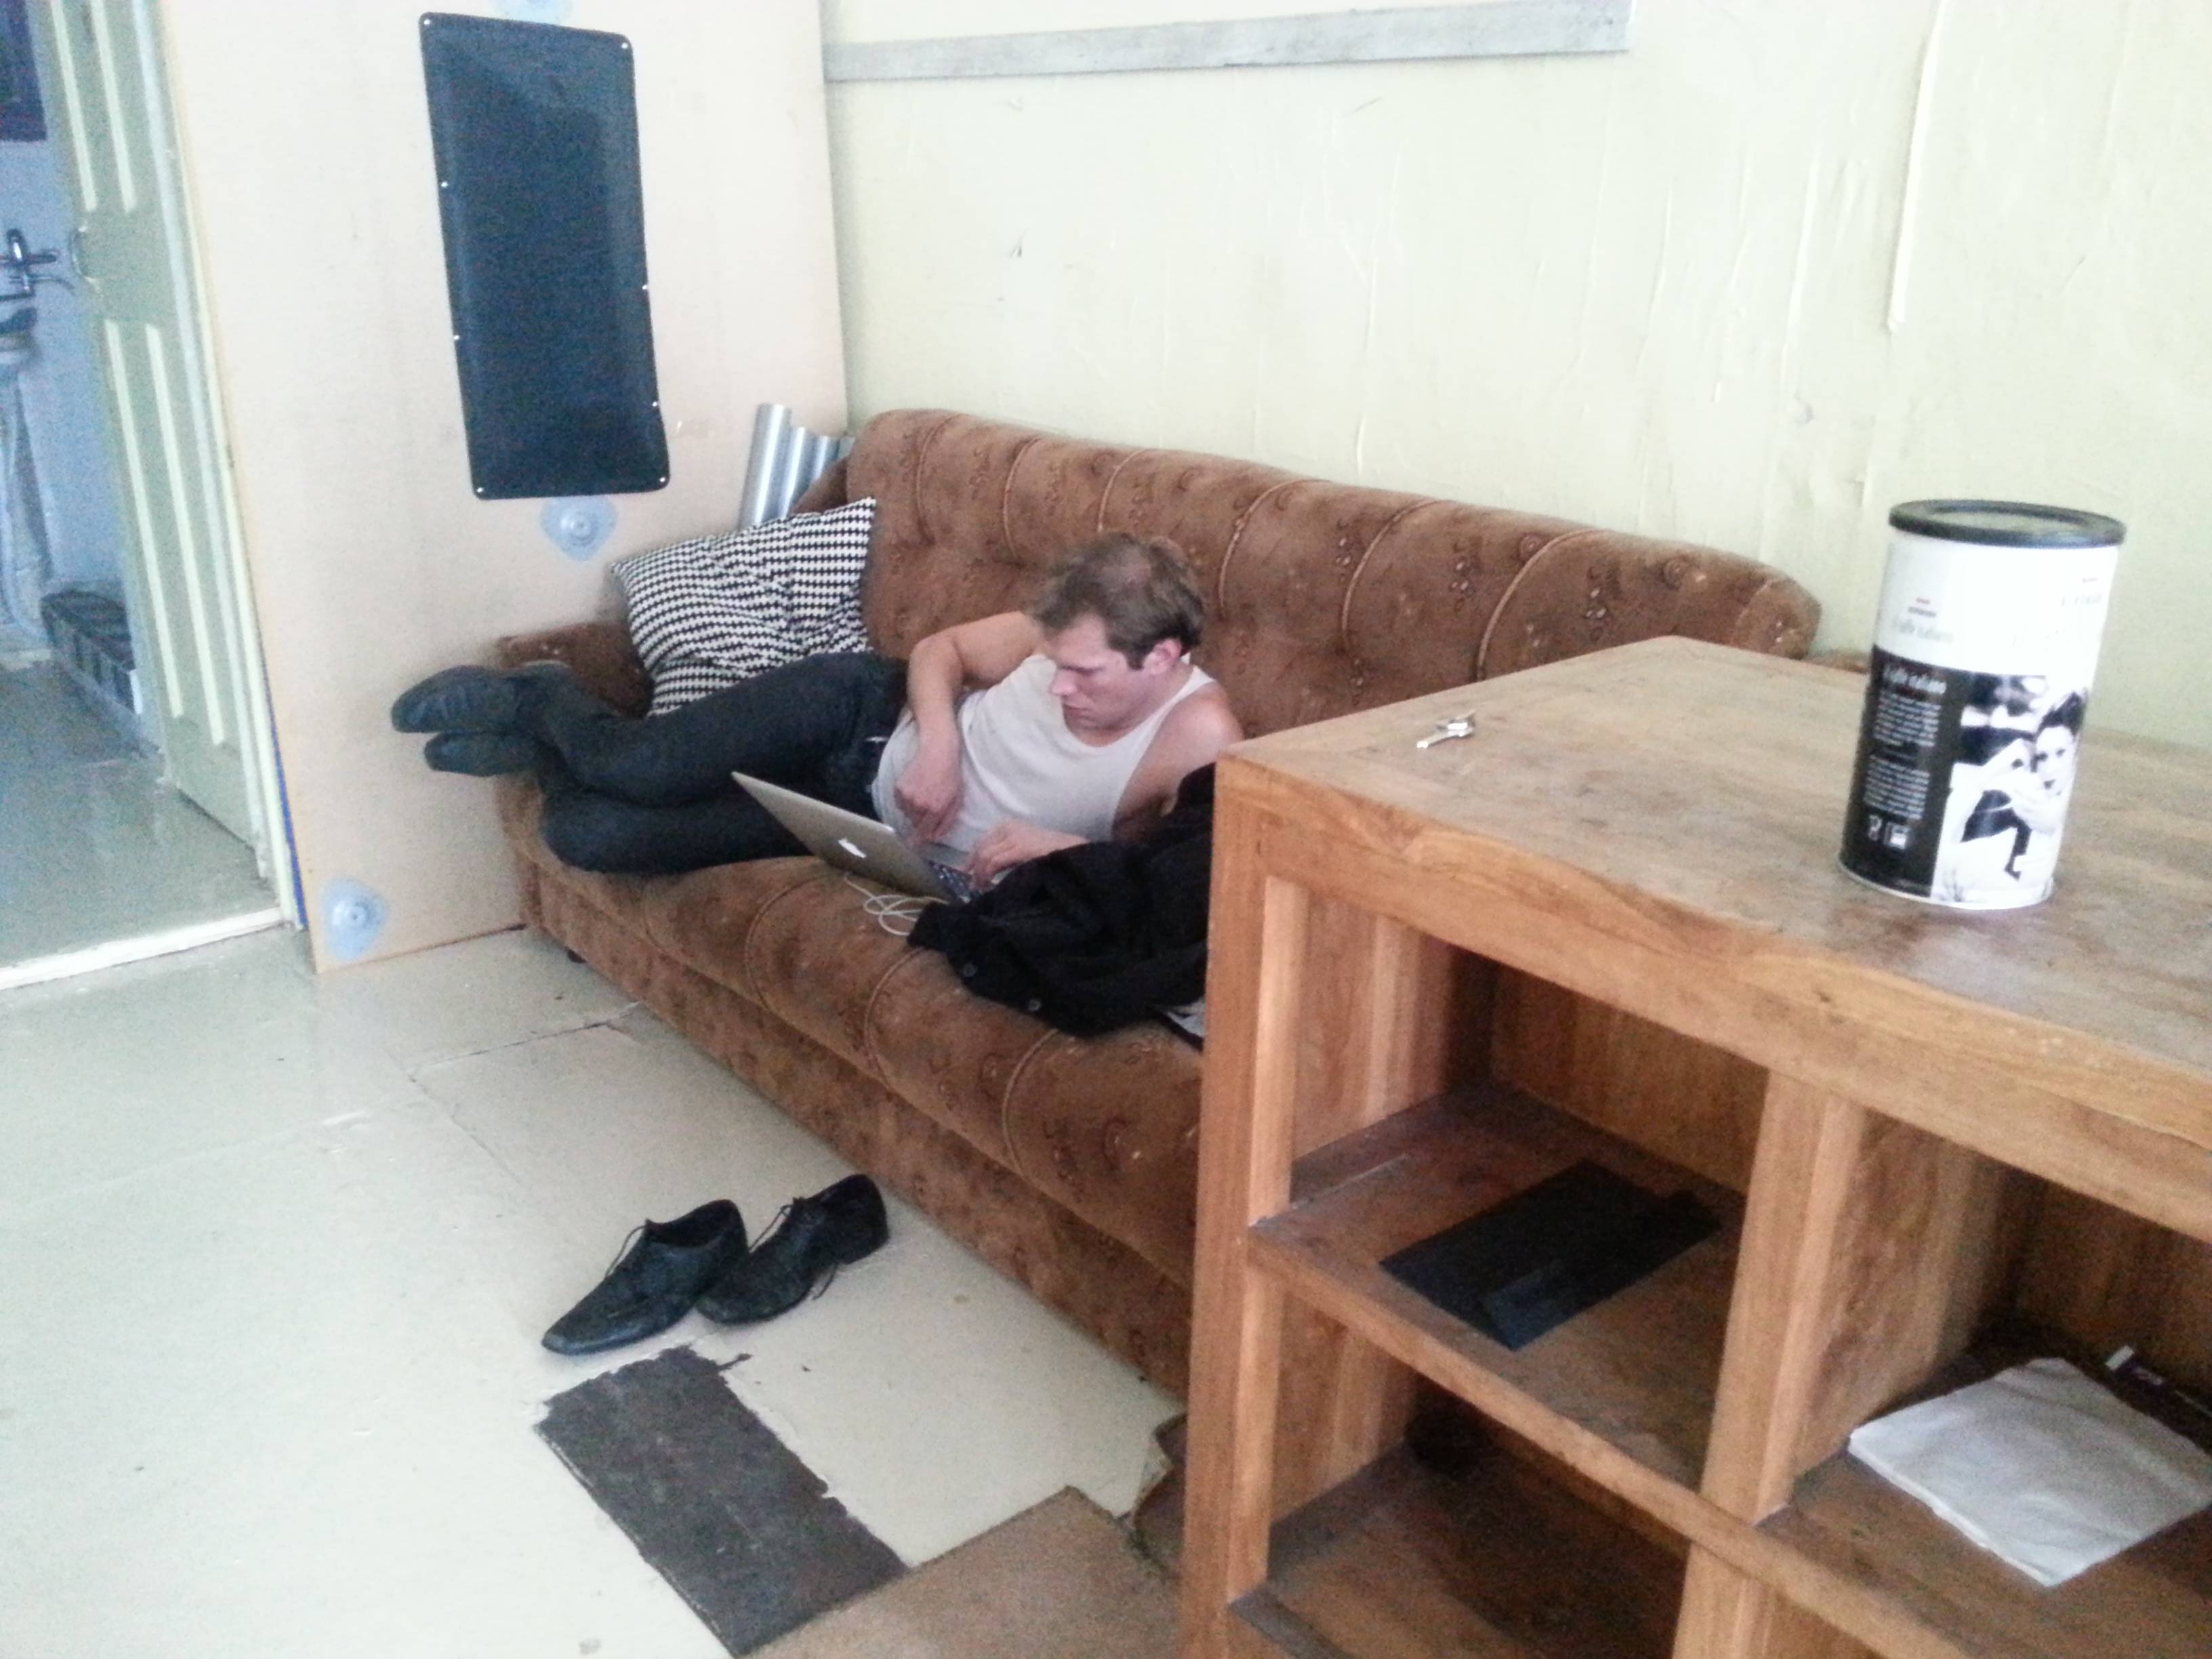
This is how a writer likes to work (and yes, this a fragment of our office in warmer times; I just burned wood to make it slightly warmer as there’s still a winter outside and we burn wood to make it warm). Note that due to Articy being Windows-only, the visible laptop has been replaced with a less Mac one.

My current goal for the past three months has been bootstrapping the writers. We need a way of testing and playing through the mass of dialogues while building an engine. So: for the writers to be productive they need both a way to import them into dialogues and also a finished-looking dialogue windows which behaves like they expect. So they can see when their own dialogue does not behave expedtedly.

Articy: Draft 2

During the early days of the project we understood that we have neither the time or resources to create our own dialogue producing program. We dreamed about Obsidian’s tools; looked into Chat Mapper, Twine and then settled for Articy:Draft 2 from Nevigo.

Chat Mapper had severe interface problems (it’s extremely “clicky” program and it requires you to click around a lot while lacking keyboard fluency); it also looked slightly uneappealing like it could break at any minute — it meant that we met some resistance with selling it to the authors.

Twine was interesting, yet it wasn’t exactly forthcoming — we needed something else.

We went for Articy: Draft 2, since the writers liked it and we as programmers also liked it — it has a strong templating system, has support for cooperative editing with its lock/unlock logic and seems stable enough for our needs. The interface of the program has been designed to be flexible; there are annoyances like when invisible dialogue windows appear and lock it up, but all in all it’s a solid piece of software. It is also really graphic-heavy: your small mobile graphics-processor will not zoom out your full-sized dialogue tree.

If I was a single-person programmer/writer I’d recommend the program highly since its solo license for an indie is absolutely adorably well priced. For slightly larger dev-teams and text heavy rpg-s I’d be extremely cautious, as currently I have three writers an occasional editor and occasional myself, who share the trio of lower-priced floating licenses and it’s getting rather crowded, as you might imagine. If you are well-funded I think the software is the way to go: Think of the full price per seat at your max cast before commiting to the software.

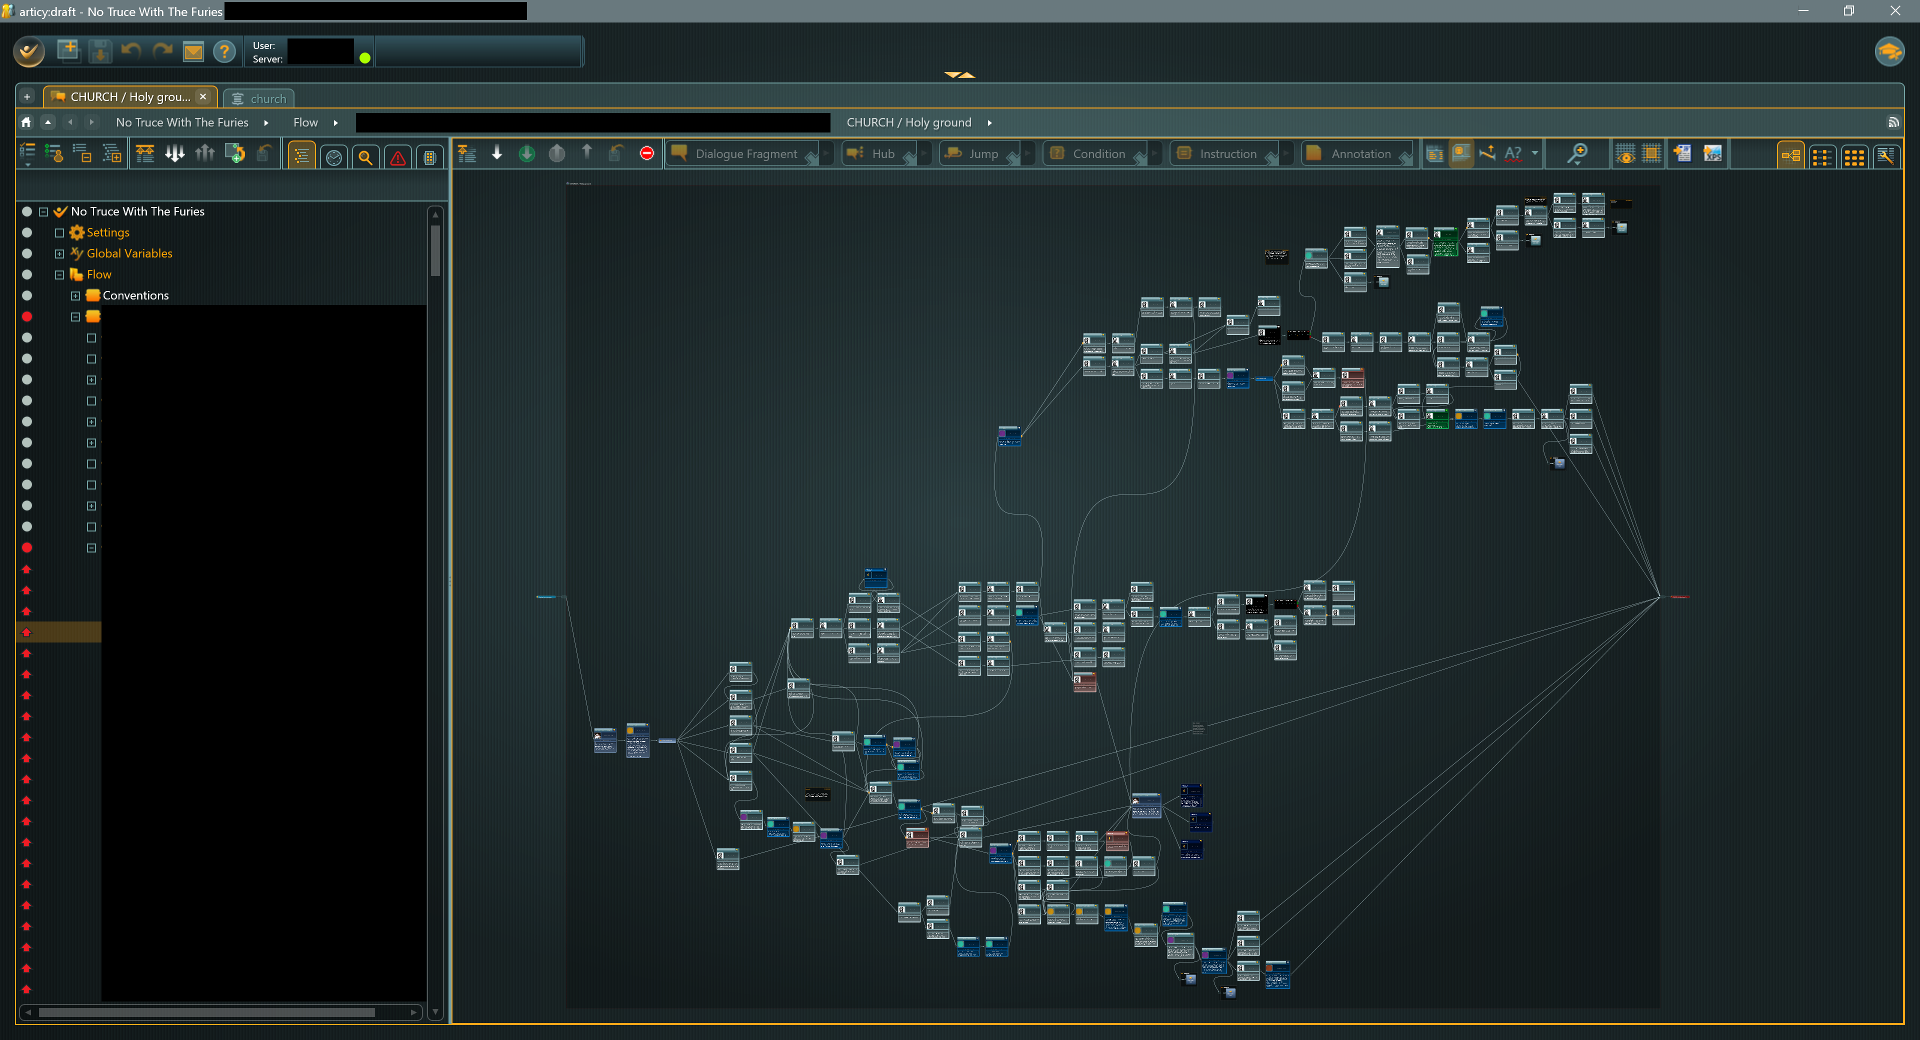
On the image above you can see a smallish dialogue. From Articy we export to .xml. We tried and looked into Articy:Access and it is a nice thing for what it does, but since our import pathway goes through a Unity tool called Dialogue System, we passed on the opportunity of spending more (remember our frugality: I burn goddamn wood to keep my fingers flexible). That brings us to the:

Dialogue System

Made by Pixelcrushers; it is a tool for Chat Mapper and Unity integration and maintains feature parity with it, but since it imports well from Articy and the dev is one of the most friendly-helpful support persons you can meet, I think that this choice is solid. You can trust Dialogue System to show dialogues for your custom RPG. It even includes the source, but so far I have only read it to understand some of the intricacies of its inner workings.

After importing from the Articy, we had to make some adjustments to the behaviour of some dialogue lines: in essence, and this will be a separate text, we have some new ideas of how an RPG check system should work and this means that there is some processing that is done on every dialogue line to see if the line is seen by the user and if the line has some side-effects on the stats or story. Basically any ability checks are handled using a custom interpretation of Dialogue System’s lines. For the technically inclined: we use and abuse OnDialogueLine and OnConversationResponseMenu to their full potential.

Writers Tool

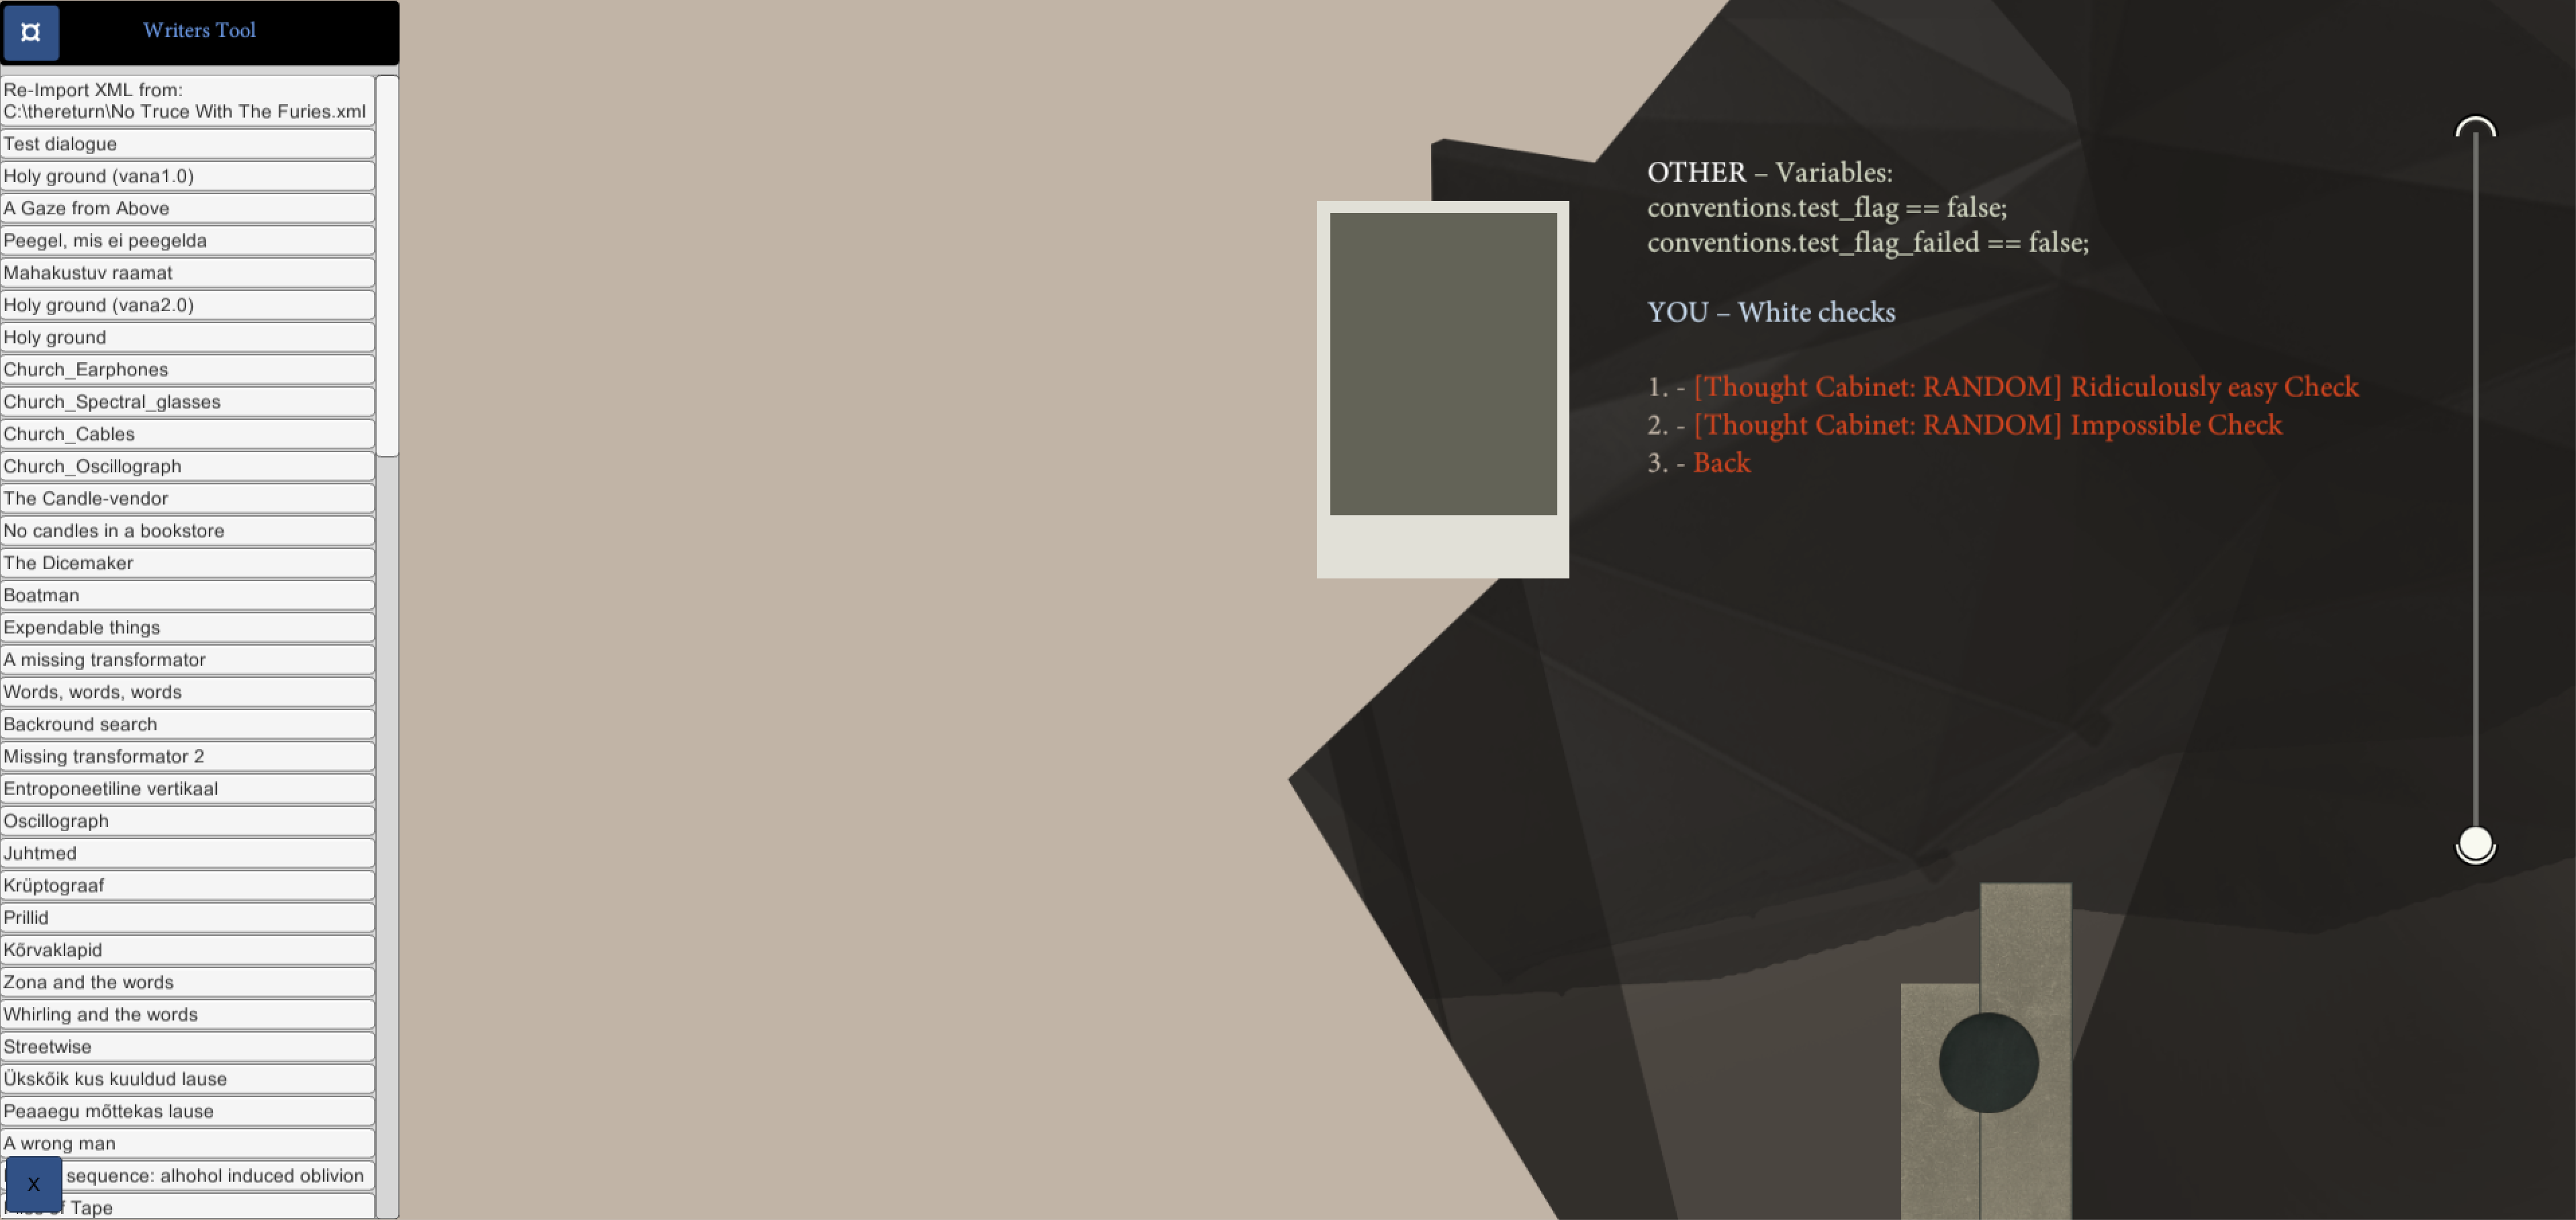
This is what I have been building for the writers so that they can import their .xml into the game without ever running Unity. It has a list of dialogues which you can run. Currently it also contains an amount of testing-out-stuff and Estonian comments. It also shows our dialogue window, as it stands as of now. From this tool we, at some point, will change the dialogue variables.

You can also see the current in-progress state of our dialogue UI. There will be an eerily cool dynamic background to it which has been programmed, but still needs some integration.

So now the writers have begun playing through their dialogues and I occasionally laugh myself to tears when reading what they have made.

Comments

Weather duty

Hi there! While kinnas and the art team are busy concepting and modelling away, I’m on day/night cycle and weather duty. The main challenge here is to squeeze as much visual variation out of as little pre-rendered pixels (and final game size) as we can. We wouldn’t want to be rendering separate background images for day and night, snow and rain, etc.

The above is also the reason we are not going purely 2D but instead using very basic 3D geometry as a canvas. This gives us some extras like partially real time shadows (see below) and visual feedback when placing in-engine assets like characters.

Interior vs exterior lighting

Kinnas has only mentioned interior rendering because lighting interiors and exteriors is a very different task and warrant different optimizations and even separate shaders to make them efficient.

The main difference between the two being the behaviour of natural light. Exteriors have pretty much uniform light direction at each point in time, with light and shadows changing direction throughout the day. In contrast, interiors have light shine in from the windows (that is, each room having its own light direction which stays constant throughout the day) and daytime modulates only the light’s intensity and warmth based on the window’s direction. The latter is achieved by kinnas’s mentioned lightflow map and screencaps above.

Lighting exteriors

Since interiors have quite diffuse shadows always pointing away from the windows, we can get away with a single shadow map for the whole day cycle. Exteriors, however, are not so forgiving. You have the sun forming radically different shadows as it travels across the sky. To make those shadows happen, we would need to import enough geometry to make them detailed enough and it still wouldn’t look as good as a pre-rendered raytraced shadow.

So we are not going to do that.

We are going to bake shadows for morning, noon and night and use time manipulation and weather trickery to make them work so the player won’t notice. Here’s an excerpt from a map with the three shadows for evening, noon and morning.

Lorem ipsum dolor sit amet, consectetur adipisicing elit. Et, laboriosam, harum. Aspernatur enim repudiandae vitae inventore iure mollitia hic culpa illo sint harum, magni doloremque numquam molestias, officia debitis magnam, possimus vero? Voluptatibus itaque quae, quibusdam labore. Voluptatibus, excepturi voluptates.

These channels are to be multiplied to the background albedo map each at a certain time of day. Lack of a color means that spot is in shadow and the brightness of red, green and blue means the area is lit at the corresponding time of day at that intensity.

Here’s the result switching between the shadow maps with light and shadow color grading going on as well:

I might still play around with some ideas to keep it pretty but pack the shadow information down to something less than full-size RGB map.

Also note that shadow casting between the characters and the background is real time (based on our super simple world geometry) which still needs work and is another can of worms to be discussed in another post.

Some of the switching between the pre-baked shadow states can be handled by summoning clouds for an overcast weather but that would look suspicious three times a day. We’ll need some classic card trick misdirection while the player is busy and shuffling between interiors and exteriors.

A quick weather generator

Switching shadows and daytime isn’t enough though, a world needs weather to be believable. Since these two things go hand-in-hand, I’m also doing the rain dance.

Here’s a span of three days starting out with a warm but rainy evening and half a day of snow and fog on the morning of third day.

Generated by adding up some sine functions to make random but plausible looking weather data

This is what the graph says:

  • X axis is for days (full numbers being midnight, n+0.5 midday)
  • Y axis is for temperature/probability.
  • blue: air temperature
  • red: dew point temperature
  • orange: precipitation (red minus blue)
  • green: fog probability

The weather generator itself is going to use the above data and follow very simple rules:

  • If precipitation is above 0 and temperature is above 0, it rains.
  • If precipitation is above 1.5 and temperature is above 2, there’s lightning.
  • If precipitation is above 0 and temperature is below 0, it snows.
  • If precipitation is above -0.5, green dictates amount of fog.
  • Precipitation levels between -1 and 1 give us varying amounts of cloudiness from clear to overcast to gloomy. (should have called it humidity)

With some tinkering, these functions and rules result in mostly dry weather with some foggy mornings, now and again some rain and the occasional snowfall and the very rare lightning.

Now that we have meteorological data generated, let’s have it modulate our lighting and weather effects.

Raining makes things wet

I misuse a shadow map to mask whatever comes down from sky. Looking from straight above anything in “shadow” remains dry and rest of the scene gets affected by rain, snow, hail, etc. As it comes out, this a very fun map. I can rotate the caster to simulate wind. I can add the wet areas to background’s spec map to really make it wet. I can use edge detection to map splashes under the eaves and edges of objects. With some work, I can even wet the background spot by spot instead of doing it uniformly. Finally I can use the sun’s shadow map to dry it off at different rates. Sounds like pet project material, I’ll keep you updated which of that I can squeeze in. I should probably get back to the big tasks like day/night cycles and the actual weather machine.

Unrelated

Here’s some normals debugging for a piece of UI.